on
IoT Home Environmental Alerting
IoT Home Environmental Alerting
Internet of Things (IoT) is an ever expanding field and one of the most common things to do is environmental alerting. To do that, this tutorial uses the Twilio Developer Kit for Broadband IoT to monitor for temperature, humidity, and liquid and sends an SMS alerting you to conditions that are outside your desired parameters. The developer kit allows you to be connected to the cellular network, allowing for monitoring at remote locations such as a cabin where internet access may not be readily available.
If you are setting this up in a location where internet is available, data via a cellular network is not needed to complete setup.
Requirements
To complete this tutorial you’ll need the following
- Twilio Developer Kit for Broadband IoT (Instructions on how to purchase are at this link)
- Parallax 28090 Liquid Level Sensor
- Adafruit ADS1115 or ADS1015 ADC
- Wire to connect sensor to ADC and ADC to LTE Cat 1 Pi HAT (included in Twilio Developer Kit for Broadband IoT)
- Latest Raspberry Pi OS
- python libraries
- (Optional) Breadboard
Installing the latest Raspberry Pi OS
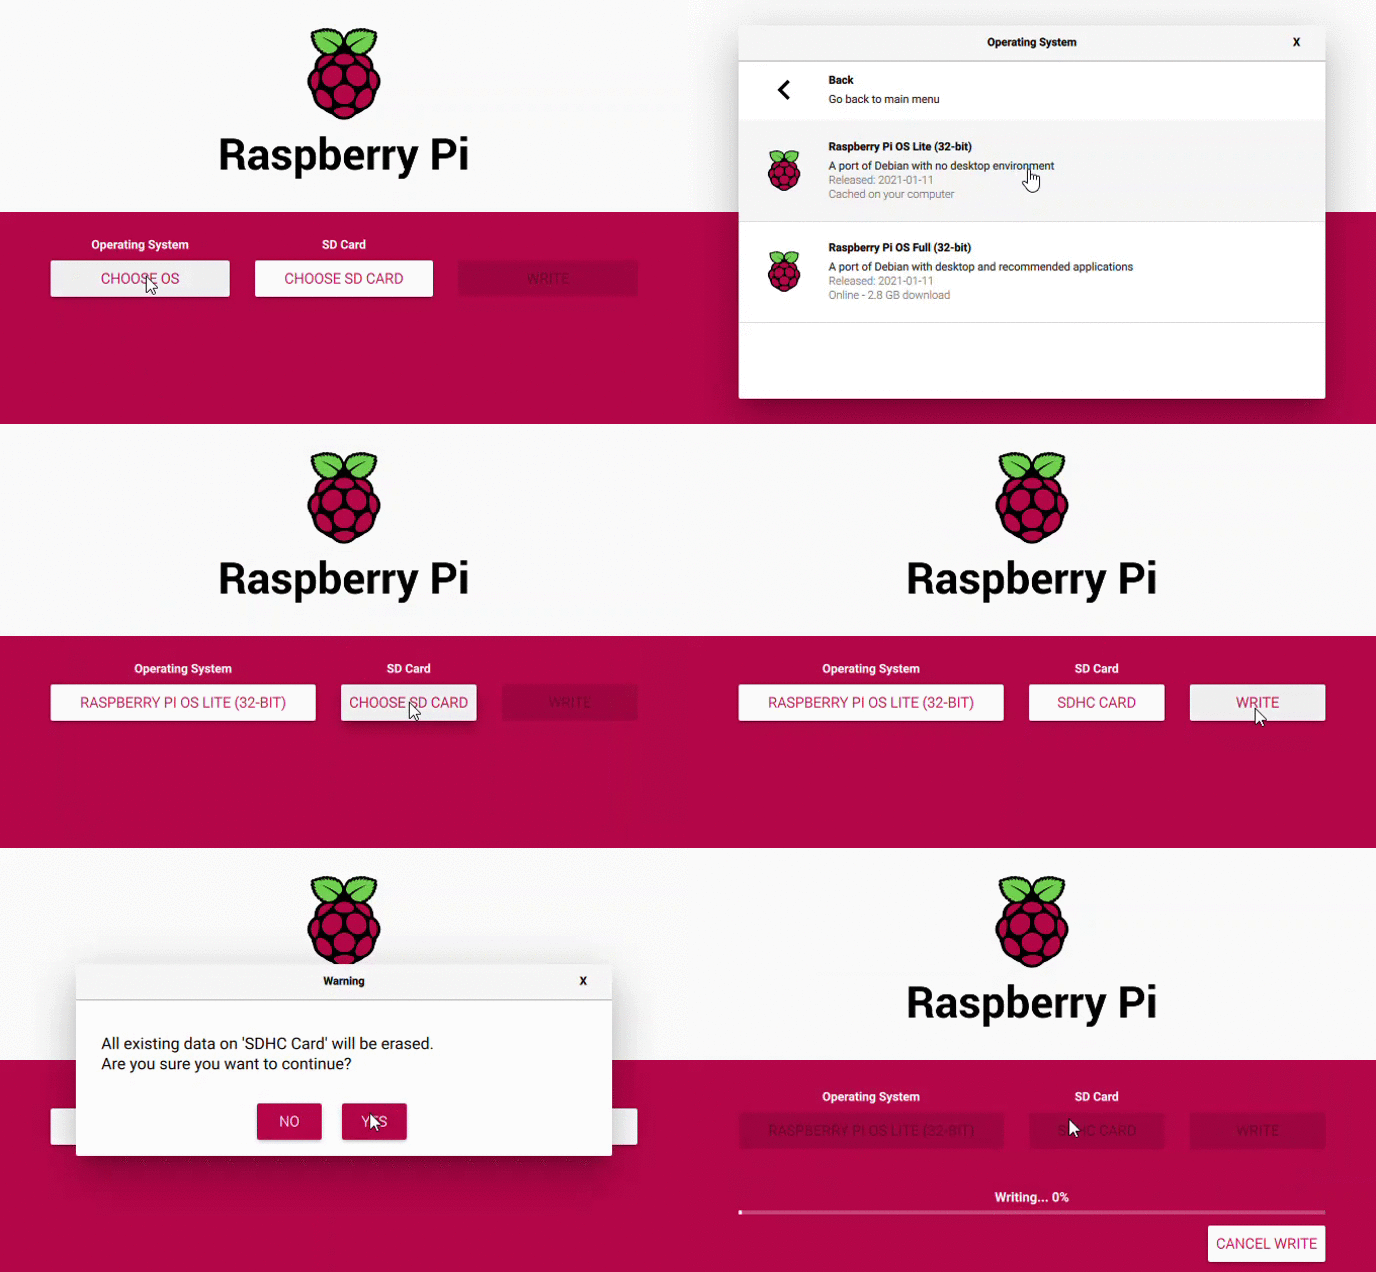
The Raspberry Pi Foundation has a Raspberry Pi Imager that can be used to get the latest Raspberry Pi OS and image it on the SD card. You can dowload the imager here. Select the latest Raspberry Pi OS Lite (that has no desktop application). We’ll connect to it via SSH to do all of our work.
Enable SSH
We’ll be connecting to our Raspberry Pi via SSH. We can enable SSH by adding a file to SD Card named ssh with no extension. This file should be added to the boot partition of the SD card (further instructions here).
Connect to Local Wi-Fi if Available
We also will want to connect the Raspberry Pi to Wi-Fi if available to reduce data costs on our Twilio SIM card.
There are many ways of doing this but the “headless” way is to create a file named wpa_supplicant.conf in the boot directory updating the country, ssid, and psk. The Raspberry Pi foundation has more detailed instructions here.
ctrl_interface=DIR=/var/run/wpa_supplicant GROUP=netdev
update_config=1
country=<Insert 2 letter ISO 3166-1 country code here>

network={
 ssid="<Name of your wireless LAN>"
 psk="<Password for your wireless LAN>"
}
Setting up SIM Card
Twilio has a guide for registering your SIM card and selecting a rate plan. We will only be using data to send sms messages.
Getting a Twilio Phone Number
You’ll need a Twilio phone number, short code or you’ll have to port your personal phone number over to Twilio. Here’s Twilio’s guide on getting a phone number setup.
Twilio Developer Kit Setup
Twilio has a Quick Start Guide that walks through how to setup and get going with the developer kit that is worth. Follow the hardware setup section, don’t plug in the screen, and this guide will take it from there.
Connecting the Liquid Level Sensor to the Raspberry Pi
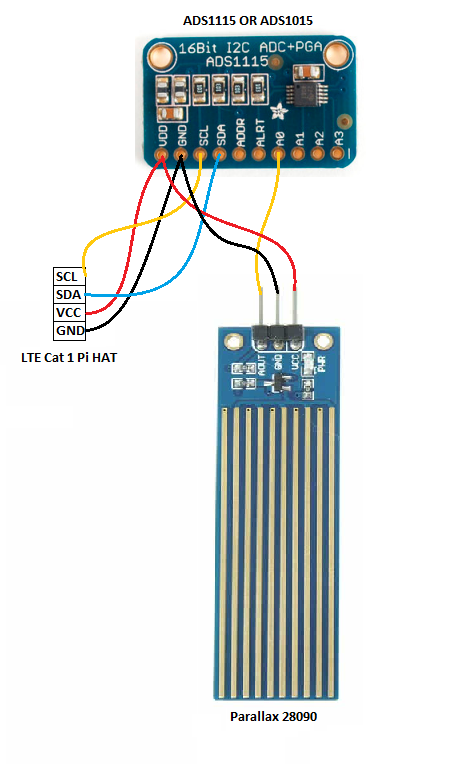
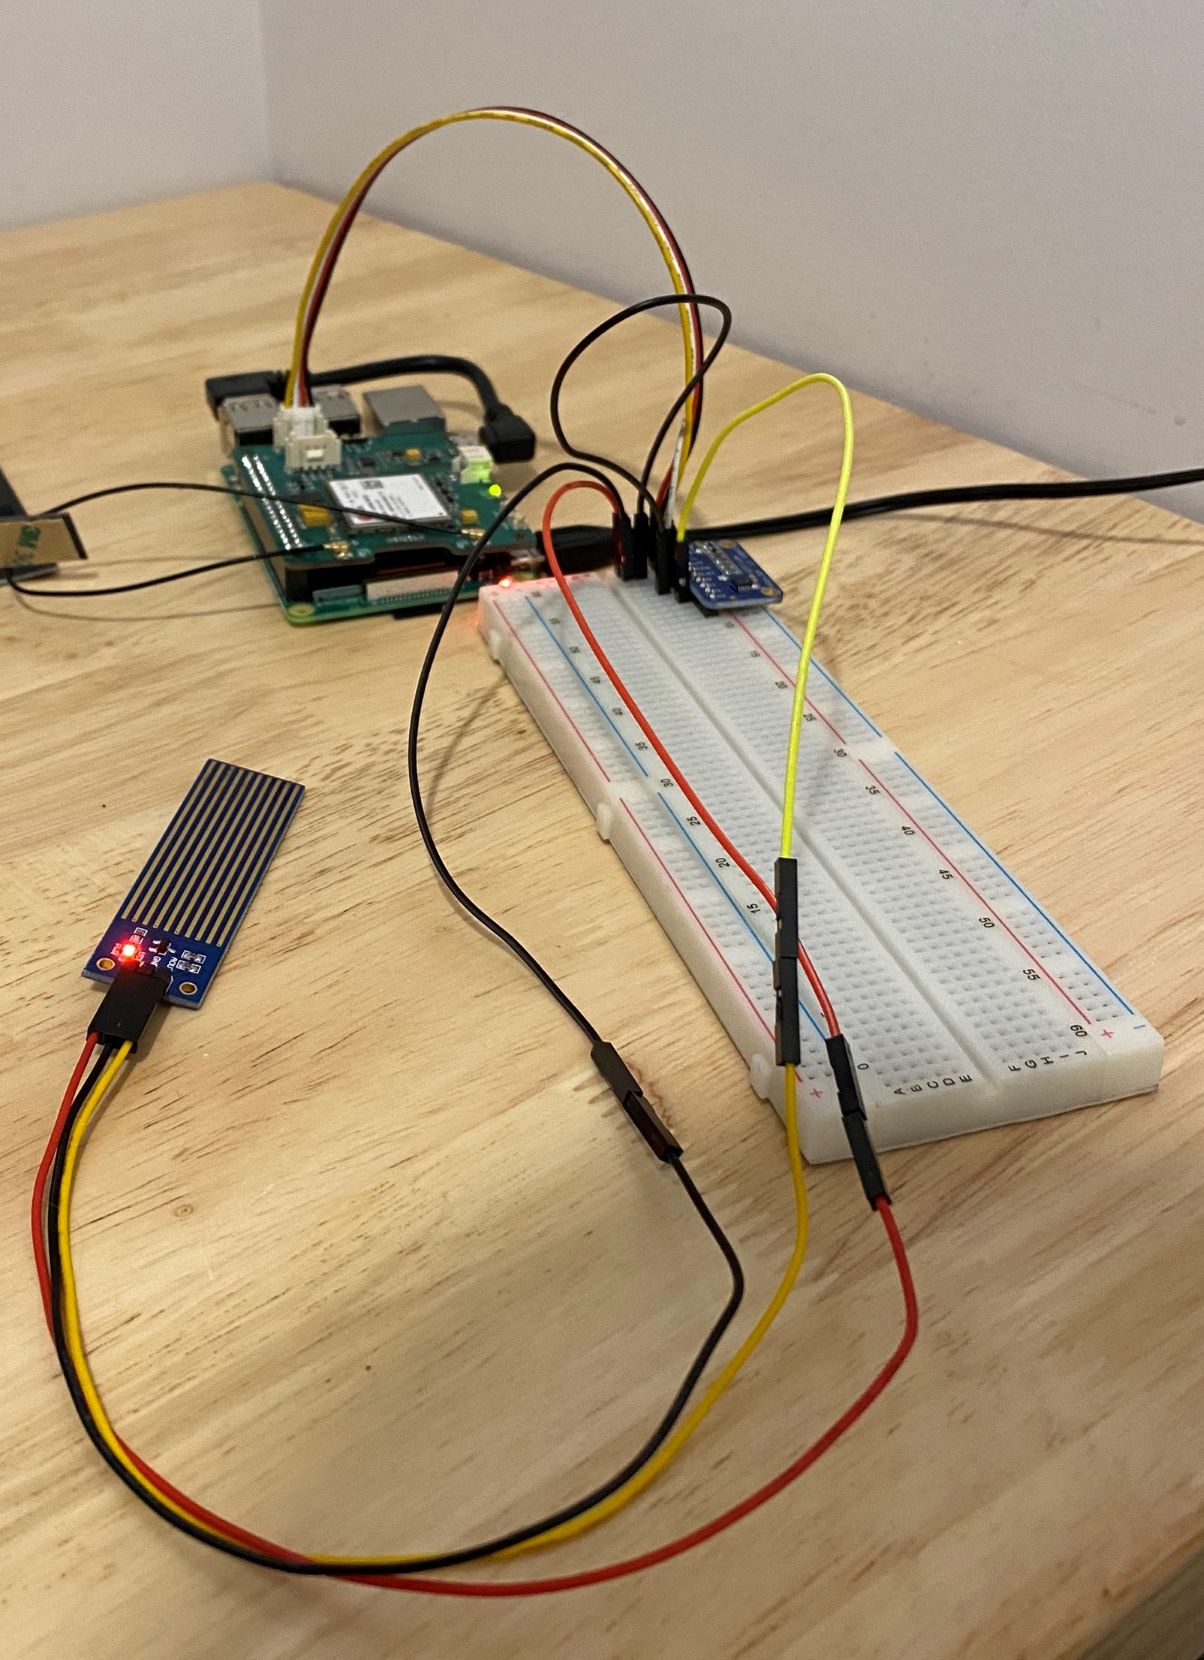
If you connected the screen to the I2C port disconnect it now as that is where we will connect our liquid level sensor to. See the diagram and image below on how to wire it up. Also read Adafruit’s guide for further details and warnings when wiring.
Power up!
Once the above is complete we can power it up. Once powered up you should see some lights on the Raspberry Pi, the LTE Cat 1 Pi HAT, and the liquid level sensor.
SSH into Raspberry PI
To confirm that you’re connected to Wi-Fi, login to your router and confirm that a device named raspberrypi or equivalent. Note the IP Address and while you’re at it setup a permanent IP Address to make connecting to your Raspberry Pi easier.
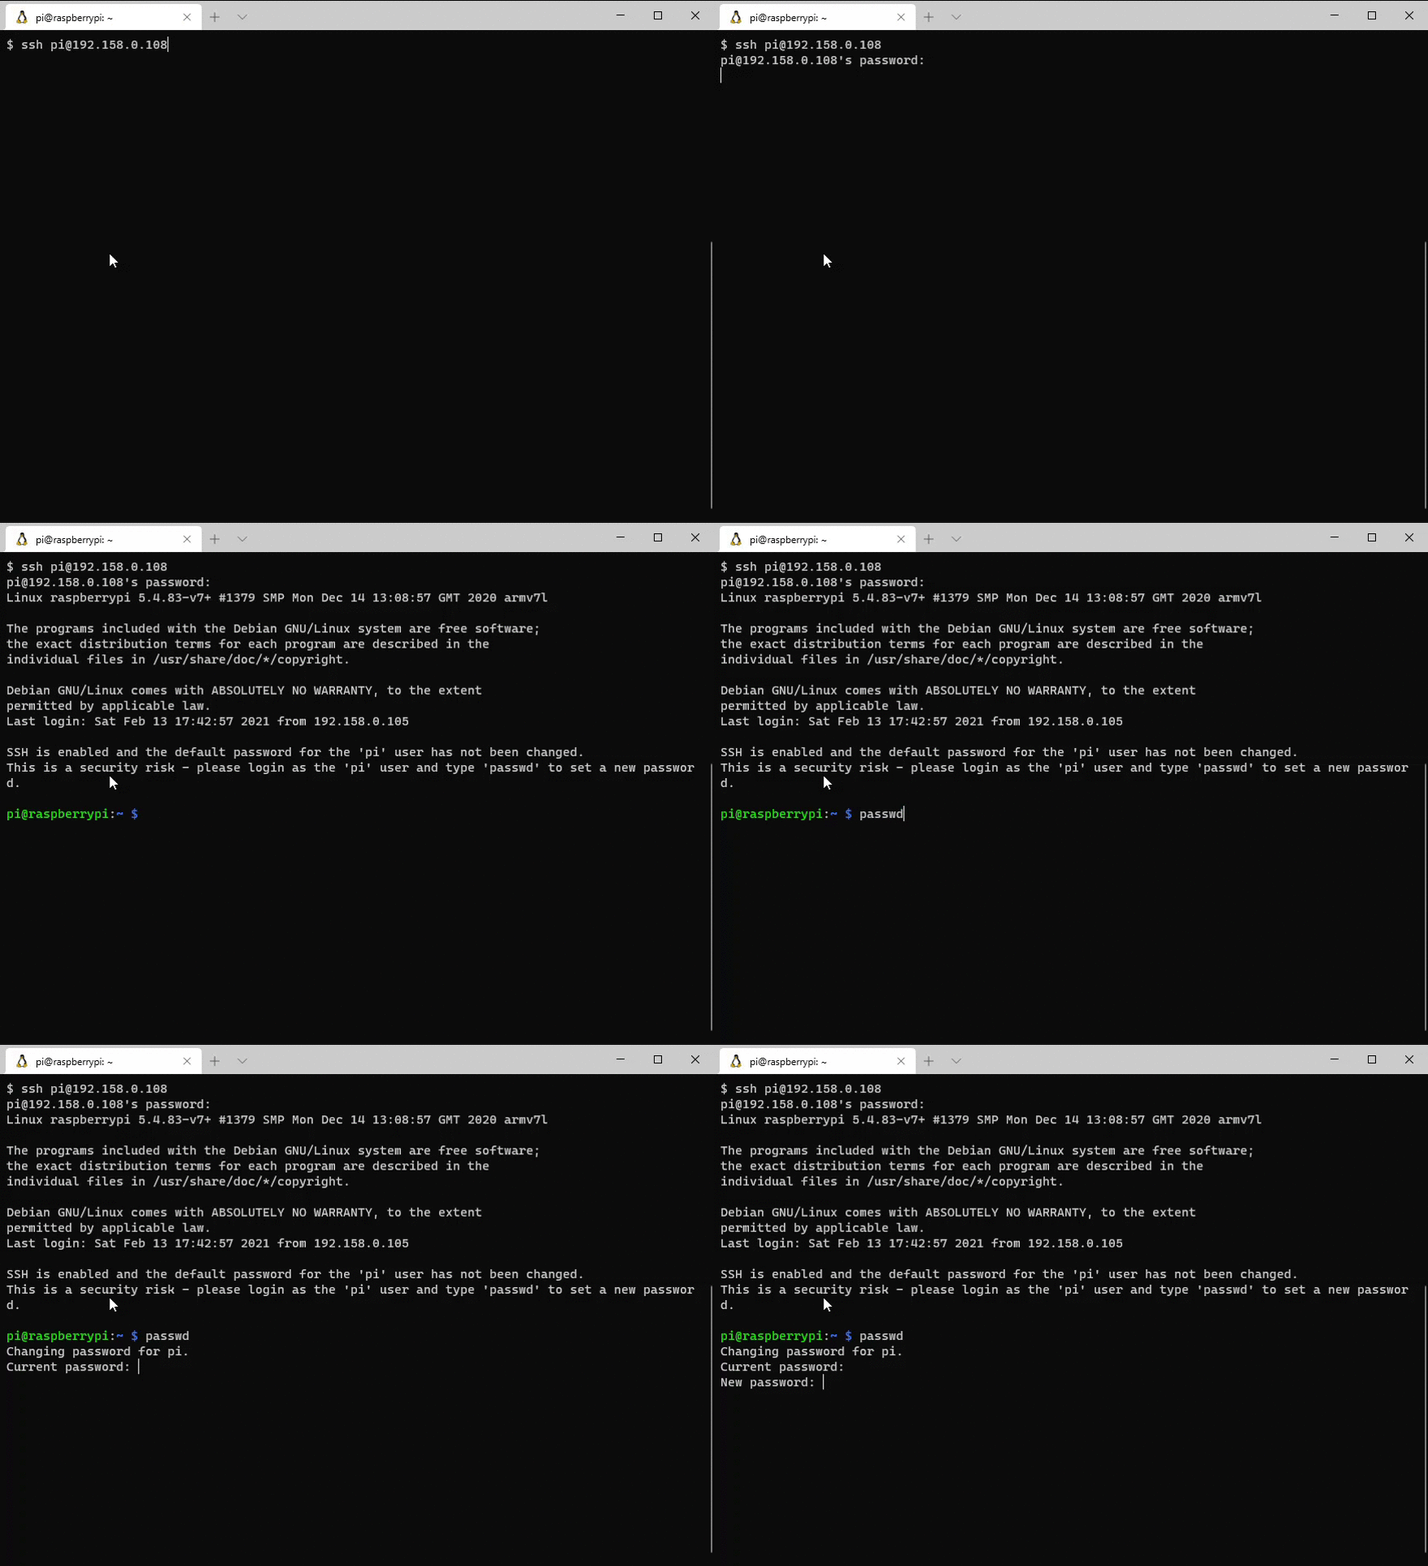
If the the device is listed in your router, you should now be able to SSH into the Raspberry Pi.
ssh pi@<YOUR IP ADDRESS>
Set Timezone
We’ll set the timezone of the Raspberry Pi. This will make configuring our cron jobs easier
sudo raspi-config
Installation of Libraries
For development we’ll be installing the following libraries but first will run sudo apt update to update
- git (
sudo apt install git) - python 3 venv (
sudo apt-get install python3-venv) - python 3 pip (
sudo apt install python3-pip) - groove.py (Install Instructions)
Let’s now make a directory called environment_alert/ for our project and make it the working directory, create a virtual environment and activate it
mkdir environment_alert
cd environment_alert/
python3 -m venv venv
source venv/bin/activate
Once activated install the following packages
pip install grove.py adafruit-circuitpython-ads1x15 luma.core luma.oled paho.mqtt twilio
Follow Twilio’s best practices and add your credentials to a twilio.env file
echo "export TWILIO_ACCOUNT_SID='ACXXXXXXXXXXXXXXXXXXXXXXXXXXXXXXXX'" > twilio.env
echo "export TWILIO_AUTH_TOKEN='your_auth_token'" >> twilio.env
echo "export TWILIO_PHONE_NUMBER='your_twilio_number'" >> twilio.env
echo "export PERSONAL_PHONE_NUMBER='your_personal_number'" >> twilio.env
source ./twilio.env
If you are going to be pushing these files to source control makes sure you don’t upload the twilio.env file by adding it to your .gitignore file.
Create Environment Alert Script
This is the python code that we’ll run to get the temperature, humidity, and whether or not there the liquid level sensor detects any liquid. The GroveTemperatureHumiditySensorSHT3x class is taken from the following file that is part of the Quick Start Guide for the developer kit.
Github Gist of code
Make sure your working directory is still environment_alert then lets get the file
wget https://gist.githubusercontent.com/persamina/043f5e8f25b44bbddcfddcbd3ee764ab/raw/30aacb6483f4b1b6f093971fd7cbad65e67e9566/environment_alert.py
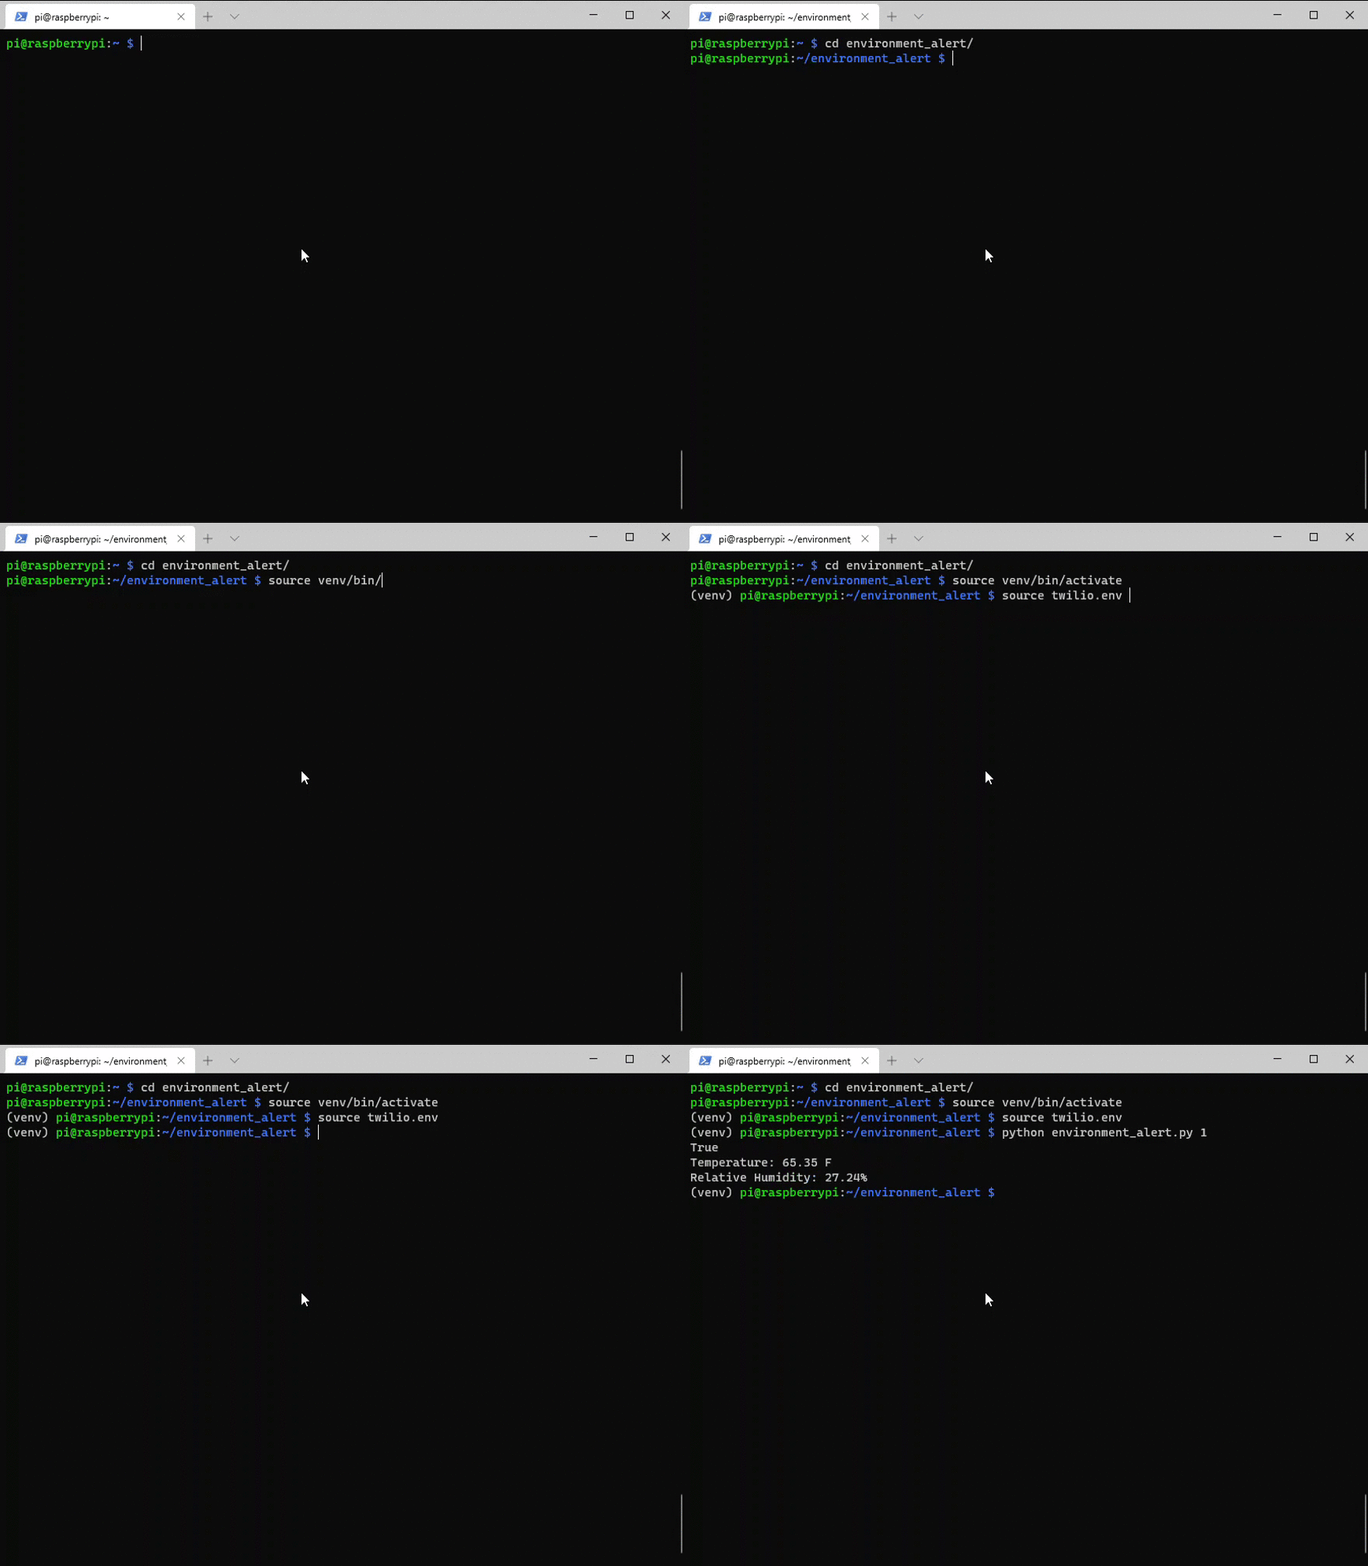
Activate your venv if it isn’t already and then run the following to verify that all of the required libraries are installed, and all config values are correct.
source twilio.env
python environment_alert.py 1
You should see something similar output to terminal as well as receive a text message to your personal phone number.
Create bash file for cron to use
Now that we have a working python script we’ll want to have our Raspberry Pi periodically run it to check for water and if it finds water to notify us via SMS. We’ll do this using crontab but since we installed all of our packages in a virtual environment and stored our secret variables in the twilio.env file we need to activate them before we run our python script.
We’ll do that via the following environment_alert.bash bash script that we’ll create in our home directory .
#!/bin/bash
source /home/pi/environment_alert/venv/bin/activate
source /home/pi/environment_alert/twilio.env
python /home/pi/environment_alert/environment_alert.py $1
Test it by running it, you should see the temperature and humidity on the terminal.
bash /home/pi/environment_alert.bash
Setup cron
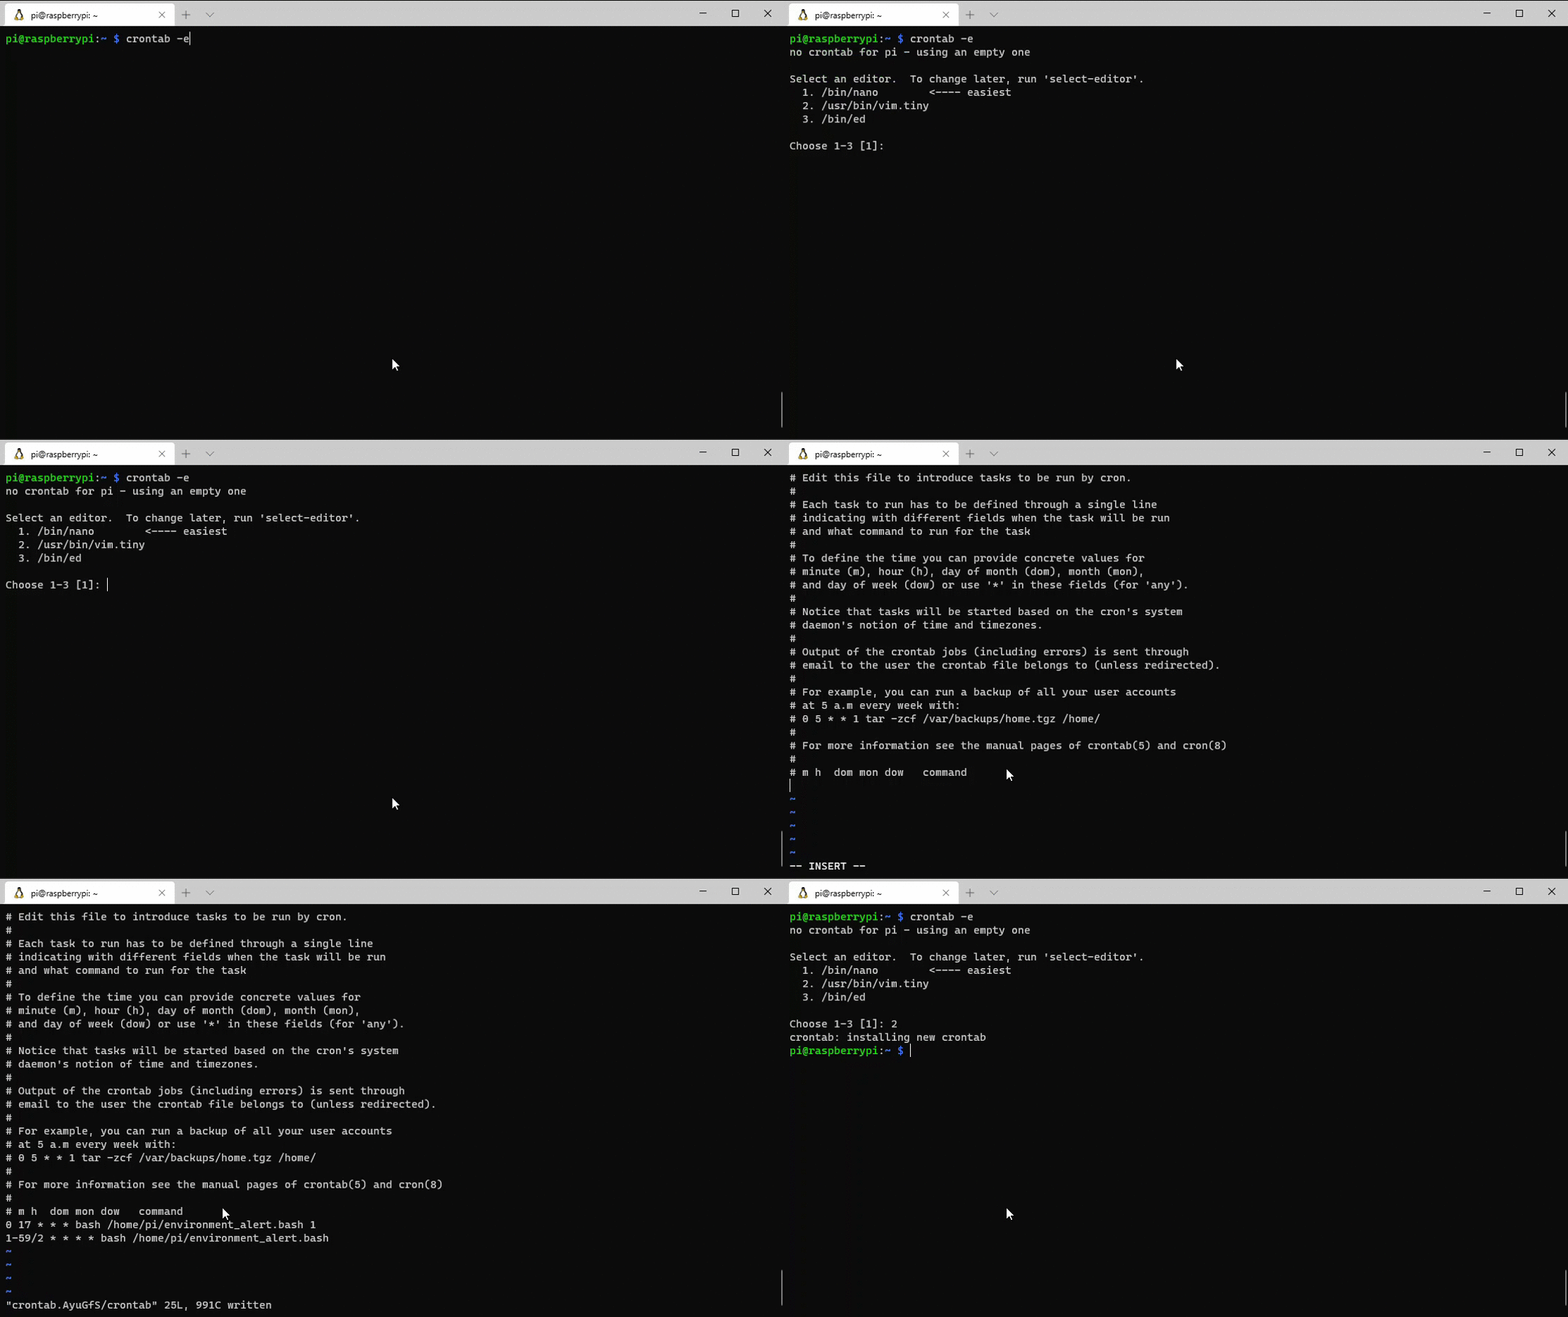
Now that we have a bash script, lets setup cron to run the script periodically. As configured below, and with the environment_alert.py file provided the script will be run every other minute and once at 5:00PM when it will send a text message with or without water detected.
crontab -e
0 17 * * * bash /home/pi/environment_alert.bash 1
1-59/2 * * * * bash /home/pi/environment_alert.bash
Conclusion
We now have a environmental alerting system that will alert us if water is detected and at 5:00PM daily will send us environmental conditions. This can be used at remote locations where Wi-Fi isn’t readily available but where the cellular network is.
In the next tutorial we’ll enhance this to also allow us to query the Raspberry Pi for the environmental conditions as well as allow us to take a send an MMS.